>>
30-MINUTE MEALS! Get the email series now →


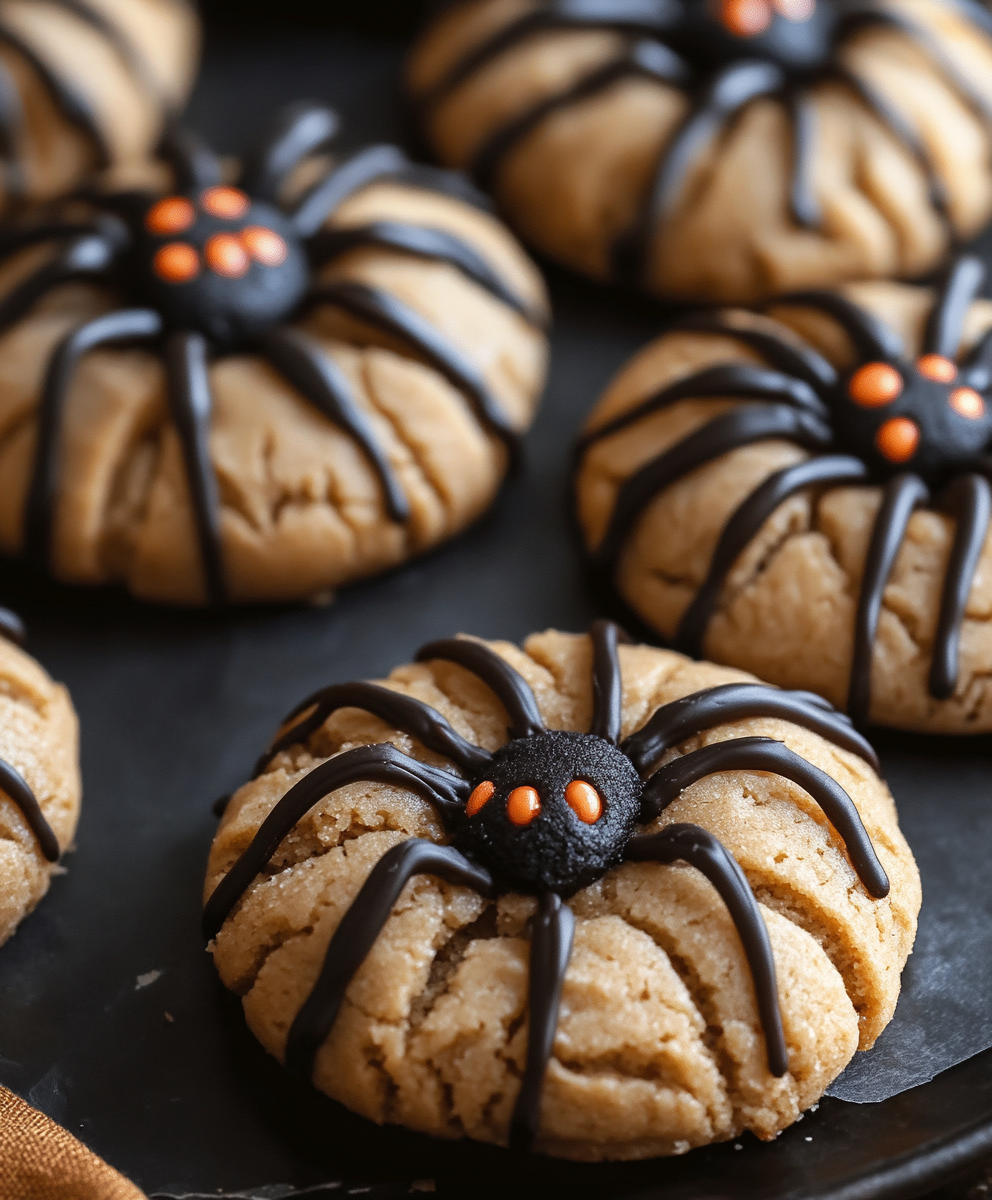
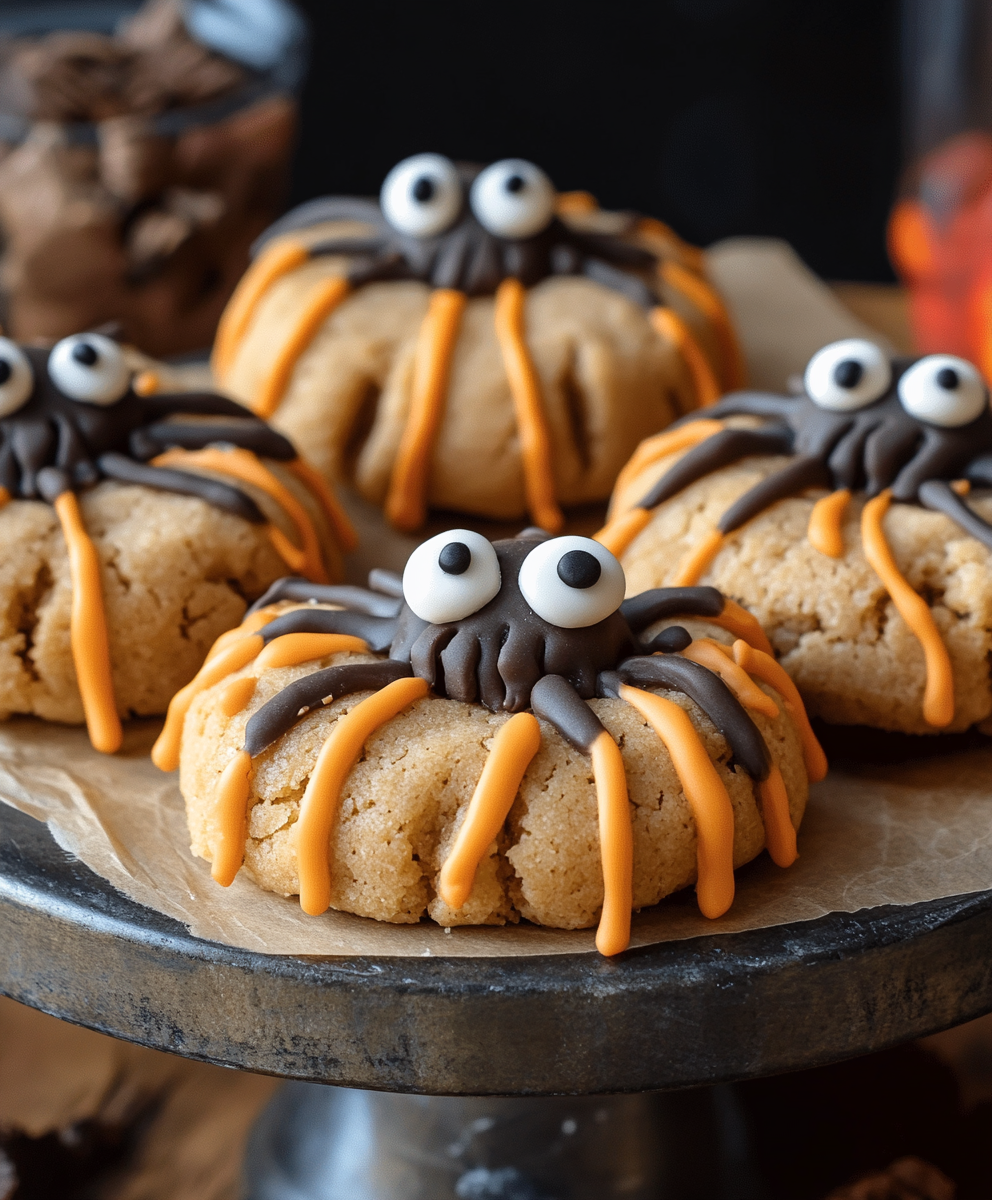
Crunchy-sugary peanut butter cookies dressed up as spooky spiders with chilled chocolate bodies and candy eyes — an easy, budget-friendly Halloween activity the kids will love.

This batch of peanut butter spider cookies has been my go-to Halloween project for years. I first made them when my youngest wanted to bring a spooky treat to school, and I needed something both inexpensive and easy enough for small hands to help with. The base is a classic peanut butter cookie with a sugar-crisp exterior and a tender, chewy center; topping them with halved chocolate truffles and candy eyes turns a simple cookie into an instant crowd-pleaser. The combination of nutty peanut butter, brown-sugar depth, and a soft chocolate dome creates a texture contrast that kids and adults both adore.
I modified the idea I found online to save time and cost: using pantry staples for the cookie dough, chilling the chocolate slightly so it slices cleanly, and switching to prepared chocolate frosting as an adhesive for the eyes and legs. They’re sturdy enough to travel, simple to assemble, and they look delightfully eerie on a plate. If you love hands-on baking with kids or need a festive dessert for a party, these are perfect — and I’ll walk you through every little trick that makes them turn out consistently well.
In my experience, these are a hit at neighborhood parties — neighbors comment on how professional they look despite being very simple. My kids love helping, and one year my son insisted we add a tiny dab of red gel icing for “spider blood” around the eyes; it was a small flourish that made everyone laugh and kept the cookies on the party table longest.
My favorite part is watching the kids’ faces when the eyes go on — suddenly they’re not cookies, they’re characters. One year my neighbor’s toddler stacked three cookies and proclaimed he was building a spider tower; that memory still makes me smile when I make these.
Store cooled cookies in a single layer or with parchment between layers inside an airtight container at room temperature for up to three days—this keeps the cookies tender while the sugar coating stays crisp. For longer storage, place unassembled baked cookies (without truffle halves or frosting) in a freezer-safe container or bag for up to three months; thaw at room temperature and assemble just before serving to preserve the candy decorations. If you freeze assembled cookies, wrap them tightly and thaw in the refrigerator overnight to avoid condensation melting the chocolate domes.
If you need to make changes, swap vegetable shortening for softened unsalted butter (1:1) for a richer, slightly more spread-prone cookie. Replace truffles with halved mini peanut butter cups for extra peanut flavor. To make dairy-free versions, choose dairy-free chocolate truffles, dairy-free frosting, and use a plant-based milk. For gluten-free, use a one-to-one gluten-free flour blend and check that your decorative candies and frosting are certified gluten-free — texture will be slightly different but still delicious.
Serve these on a dark platter with parchment cut into cobweb shapes or arrange around a centerpiece of caramel apples for a Halloween spread. They pair well with milk, hot chocolate, or a scoop of vanilla ice cream for an adult-friendly dessert. For parties, display on tiered trays at varying heights and add edible wafer spiders or candy corn for extra festivity.
Decorated cookies have long been part of seasonal celebrations; these simply take the classic American peanut butter cookie and give it a playful Halloween twist. The use of small chocolate domes and candy eyes recalls the tradition of using confections to create characters and creatures for holidays, a practice seen in many cultures where sweets become a canvas for storytelling and seasonal symbolism.
For fall, add a pinch of ground cinnamon to the dough for warm spice notes, or use pumpkin-spiced frosting on top of the chocolate for a thematic twist. Around Christmas, leave off the spider details and top the cookies with halved chocolate and festive sprinkles. In spring, swap candy eyes for pastel-coated mini candies to make playful Easter bunnies instead of spiders.
Make the dough up to 48 hours ahead and refrigerate in a covered bowl; roll into balls and store on a tray covered with plastic to keep shape. Bake on the morning of your event, cool, then assemble; this keeps decorations fresh and avoids melted chocolate. If assembling for a large event, enlist helpers to attach eyes and pipe legs assembly-line style — with one person cutting chilled truffles, another attaching eyes, and a third piping legs, you’ll finish fast.
These cookies are more than the sum of their parts: they’re memory-makers. Whether you’re baking with children or preparing treats for a party, the process is simple, the results are festive, and the smiles are guaranteed. Give them a try and make the spider motif your own — add tiny frosted bows or a dab of jam for a unique twist.
Chill the chocolate truffles before cutting to prevent smearing and cracking.
Roll dough balls in extra sugar for a crisp, sparkly exterior that contrasts with the tender center.
Use a piping bag with a very small round tip for precise spider legs; refrigerate briefly if frosting gets too soft.
This nourishing peanut butter spider cookies recipe is sure to be a staple in your kitchen. Enjoy every moist, high protein slice — it is perfect for breakfast or as a wholesome snack any time.
Chill the truffles for at least 15 minutes before slicing; use a very sharp knife and a gentle sawing motion for the cleanest halves.
Yes — bake and cool the cookies, then freeze in a single layer before transferring to a freezer bag. Thaw at room temperature when ready to assemble.
This Peanut Butter Spider Cookies recipe makes perfectly juicy, tender, and flavorful steak every time! Serve with potatoes and a side salad for an unforgettable dinner in under 30 minutes.
Preheat oven to 375°F (190°C). Line baking sheets with parchment paper and set aside.
Beat vegetable shortening, peanut butter, packed brown sugar, and white sugar in a large bowl with an electric mixer until smooth. Beat in the beaten egg until incorporated, then stir in milk and vanilla until smooth.
Whisk together flour, baking soda, and salt in a small bowl. Add to the wet mixture and stir until a uniform dough forms.
Divide dough into 48 even pieces, roll into balls, and roll each in 1/4 cup white sugar. Place balls about 2 inches apart on prepared sheets.
Bake 10–12 minutes until edges are set and lightly golden. Remove from oven and press a dimple into the center of each cookie with the blunt end of a wooden spoon; cool on sheets 10 minutes then transfer to a rack to cool completely.
Chill truffles for 15–30 minutes, then slice each in half. Place a truffle half rounded-side up into each cookie dimple.
Use a small dab of prepared chocolate frosting to stick two candy eyeballs onto each truffle. Pipe four thin lines on each side of the truffle to create spider legs and allow frosting to set about 30 minutes.
Last Step: Please leave a rating and comment letting us know how you liked this recipe! This helps our business to thrive and continue providing free, high-quality recipes for you.
Leave a comment & rating below or tag
@kitchenfunwithmy3sons on social media!
Juicy breakfast sausages wrapped in pillowy golden pancakes — a cozy, crowd-pleasing morning treat served with warm maple syrup and fresh berries.

Mozzarella sticks coated in crushed Doritos and fried until golden, crunchy, and irresistibly gooey — a crunchy, snackable twist on a classic favorite.
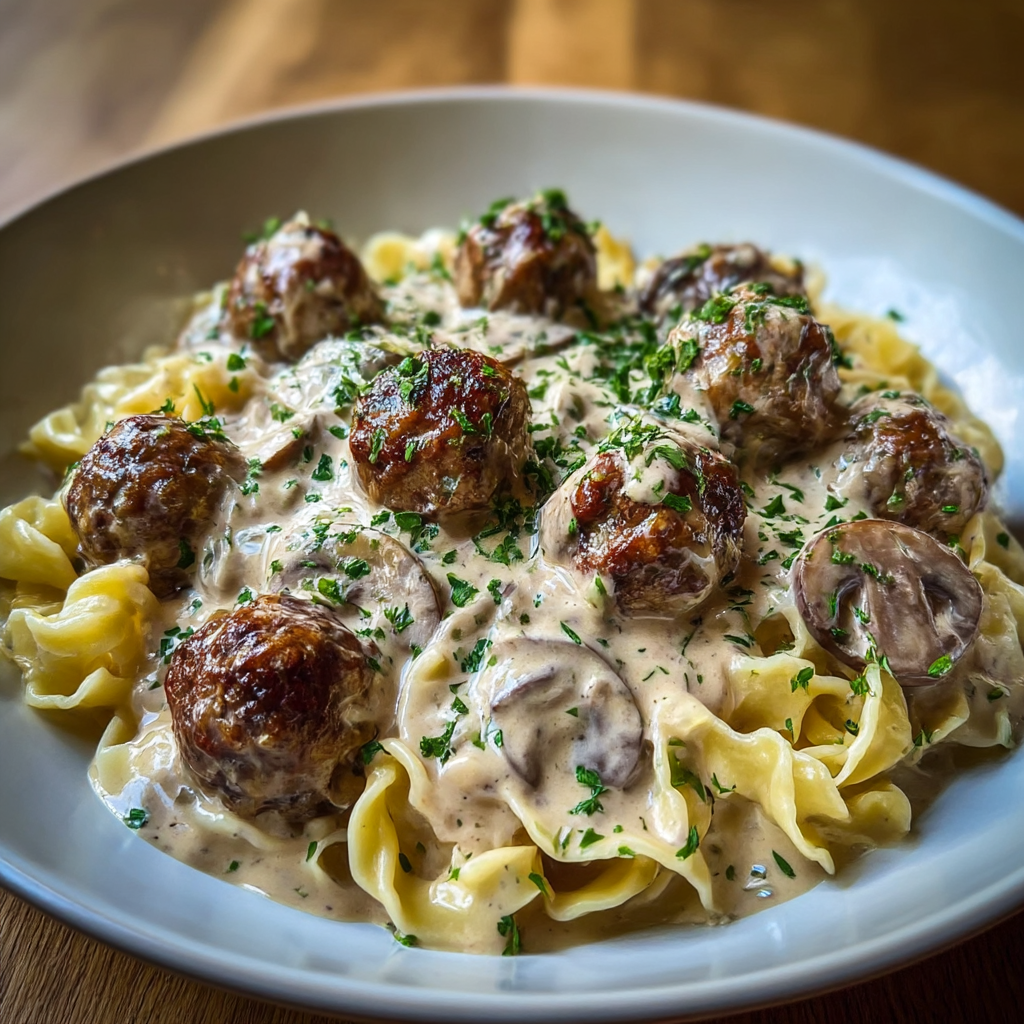
Juicy pan-seared meatballs simmered in a luscious mushroom and sour cream sauce — a comforting stovetop meal inspired by Eastern European flavors.
Leave a comment & rating below or tag @kitchenfunwithmysons on social media!
Enjoyed this recipe? Share it with friends and family, and don't forget to leave a review!
This recipe looks amazing! Can't wait to try it.
Comments are stored locally in your browser. Server comments are displayed alongside your local comments.
Quick and easy dinner ideas delivered to your inbox.